
As discussed in the previous post , the Dell Cyber recovery solution is underpinned by Data Domain. I need a Data Domain appliance in the production side that will replicate to a Data Domain appliance in the secure Vault using MTREE replication. The question is how do I get data into the production side Data Domain appliance in the first place? We could write data manually perhaps, but in the real word Data Domain will likely be be paired with some type of backup system (Dell Avamar, Dell Networker or Dell Power Protect DataManager).
This post will cover the basic standup of Dell PowerProtect DataManager (PPDM). This really is a powerful product that is multi-cloud optimised, allowing you to discover, manage, protect and restore workloads from multiple sources (Windows, Linux, K8S, VMware, Hyper-V, Oracle, SAP HANA etc.). Clearly, I won’t do it complete justice in this post, so the somewhat humble goal, as outlined above is to populate the MTREE with backup data. the fact that I got it working is of course testament of how easy a product it is to deploy and use.
Step 1: Deploy PowerProtect PPDM
Referring back to our previous diagram from the last post , we will concentrate on the ‘Green Box’.

Again, the assumption here is that we know how to deploy an OVA/OVF. The PowerProtect DataManager Deployment Guide provides all the low level detail you need. The only real step to watch is Step 5, where the OVF template asks where you wish to deploy the software? This is an ‘on-premise/hybrid’ configuration.

Next, Power up the Virtual Machine in the vCenter console. Once booted, browse using https to the FQDN of the appliance. (We have already setup NTP and DNS for everything in the last post). You will be presented with the following initial setup workflow.
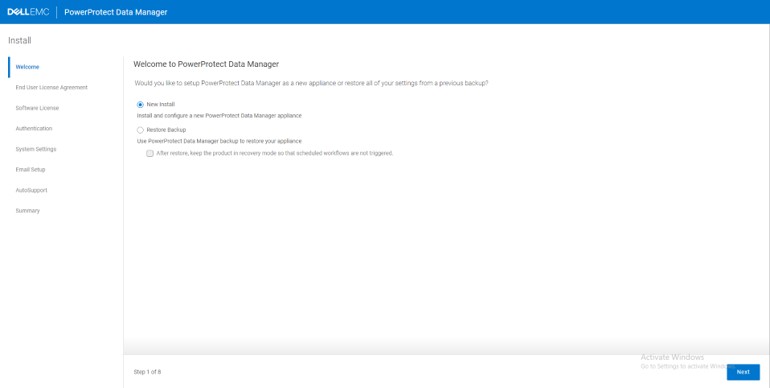
Run through the install workflow.
- Select 90 Day Eval
- Add your password for admin user (again I used the uber secure Password123!)
- Setup your Timezone and NTP servers. I used UTC+. Again, NTP is your friend so should be setup properly
- Untoggle the Mail Server option, as we won’t be sending alerts etc
The setup will take a little time, but you can watch the progress here. Exciting !

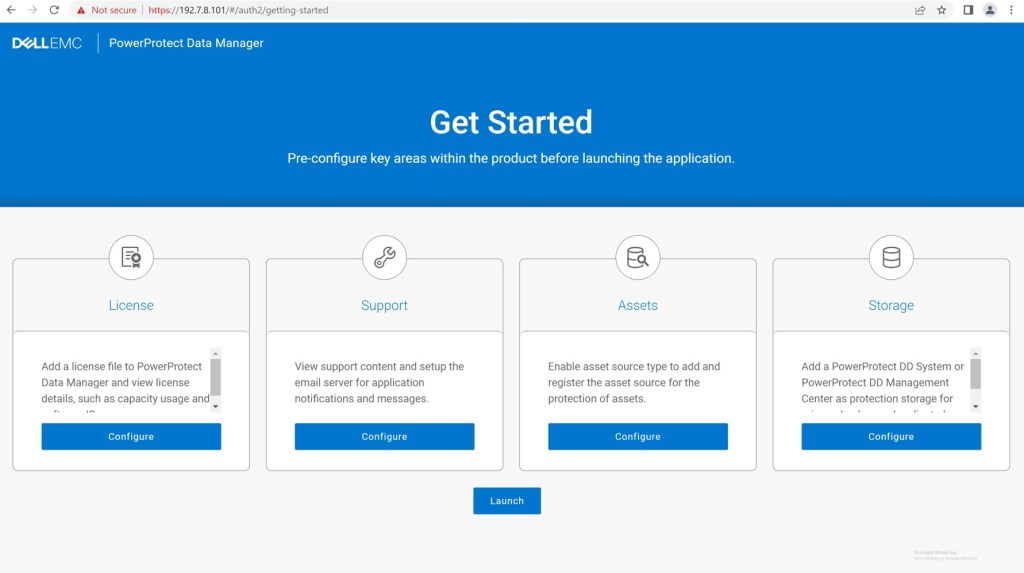
All going well, the install will complete successfully and your browser will redirect to the following screen. Skip the workflows and go directly to ‘Launch’. Logon as ‘admin’ with the password you created during the setup process.
Step 2: Configure PPDM Storage
Of course you may rightly ask, why didn’t I do this in the wizard, well…my excuse is that it does help to understand how the GUI is laid out from the main menu. In this step, we are presenting the PPDM with its target storage device, the DDVE we configured in the last blog post. This is really very straightforward.
From the main menu, navigate to Infrastructure > Storage > Add

Follow the ‘Add Storage’ dialogue, select PowerProtect DD System ad the storage type. Don’t worry about HA for now. Make sure you add the device using the FQDN and use sysadmin as the DD user. Accept the rest of the defaults and verify the certificate.
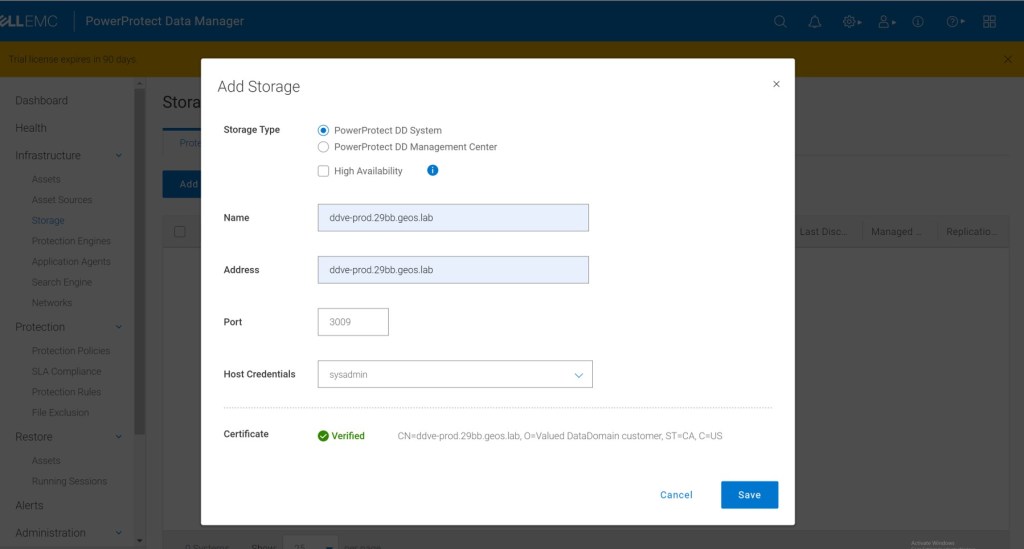
Verify you can see the newly presented storage. You may need to refresh the browser or navigate to another area of the GUI and back to storage in order to see our DDVE storage resource populate.

Step 3: Add vCenter Assets
The next step in the process is create the ‘link’ between PPDM and vSphere vCenter. Here it discovers ‘Assets’ that are eligible for protection and recovery. Firstly, we will add details to PPDM Manager regarding the vCenter server that hosts it.

Now add the the same vCenter resource so that we can automatically discover resources. When stepping through the workflow make sure you check the vSphere Plugin tickbox. Of course you are given the option of IP versus FQDN, be safe not sorry, pick FQDN.


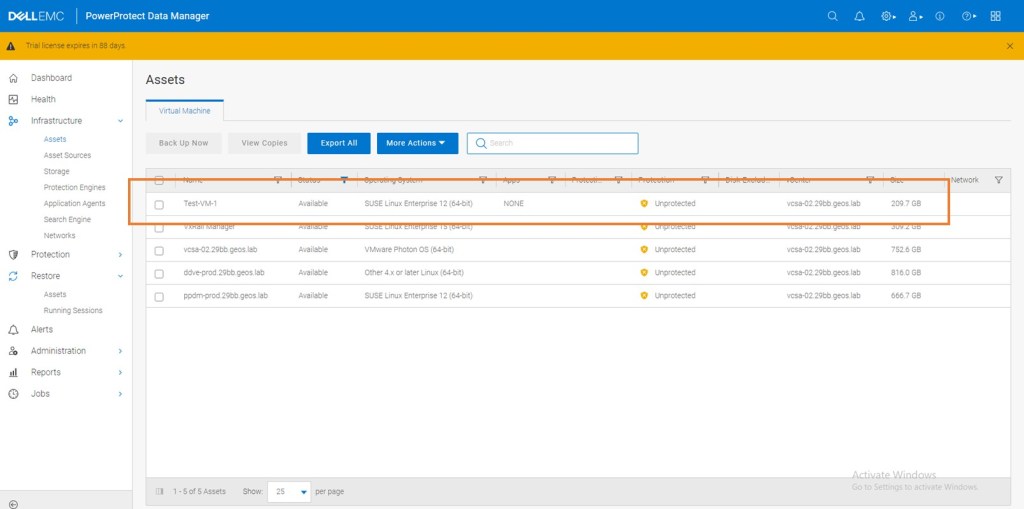
Once vCenter is added, it will automatically discover ‘assets’ under its control. In other words in the vCenter Inventory. In the next section we will create and run a demo protection policy. Truthfully this will look better via a live video. As promised at the end of the series we will do an end to end video blog… I think they are called vlogs?
Step 4: Create Protection Policy
Now we have a very basic PPDM system setup with access to Data Domain storage as a backup target and a discovered ‘Assets’ vCenter inventory to which it may apply protection and recovery policies.
Again, we will step through this in the upcoming video. In the interim, flick through the gallery attached. it should be fairly intuitive.


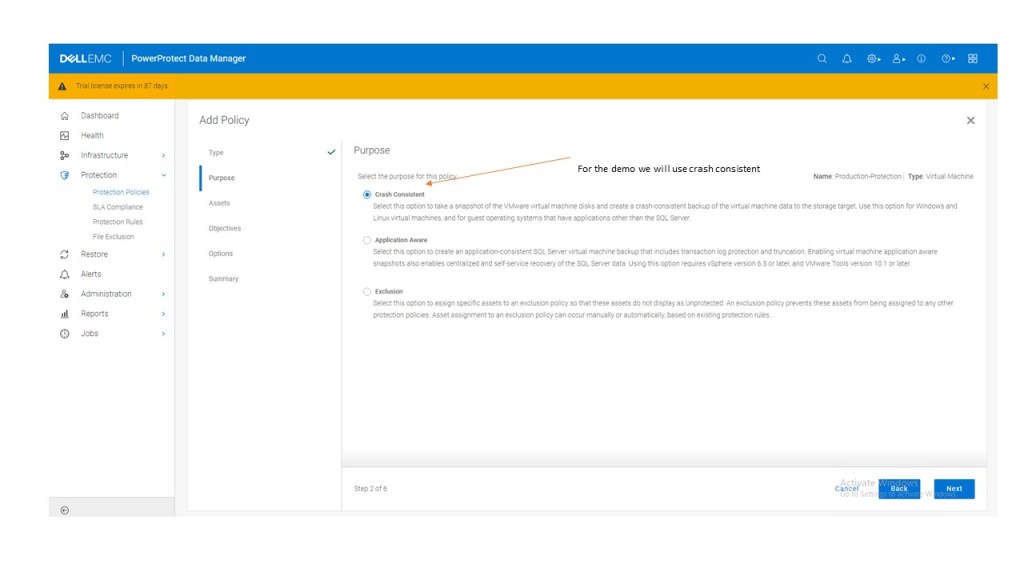


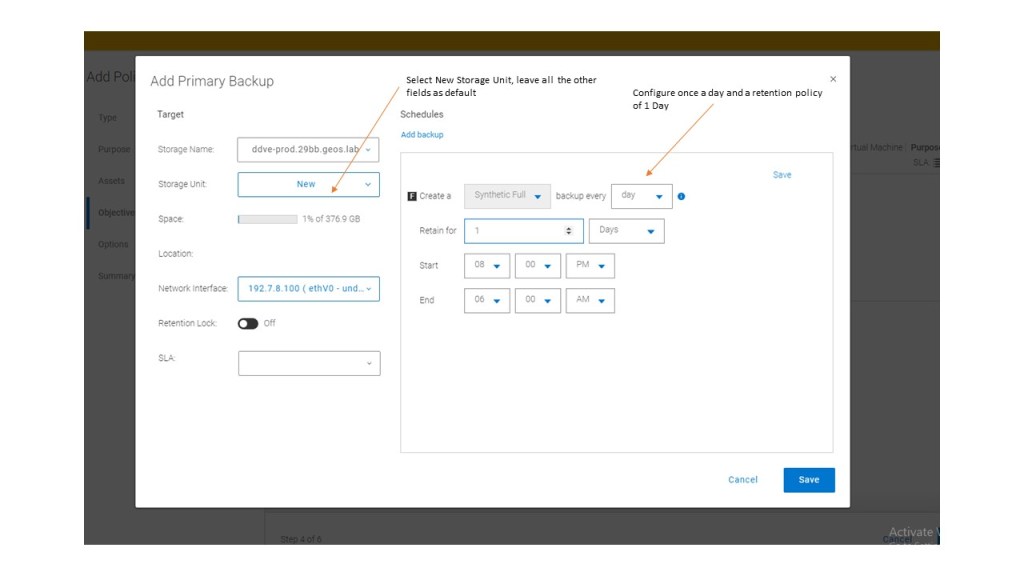

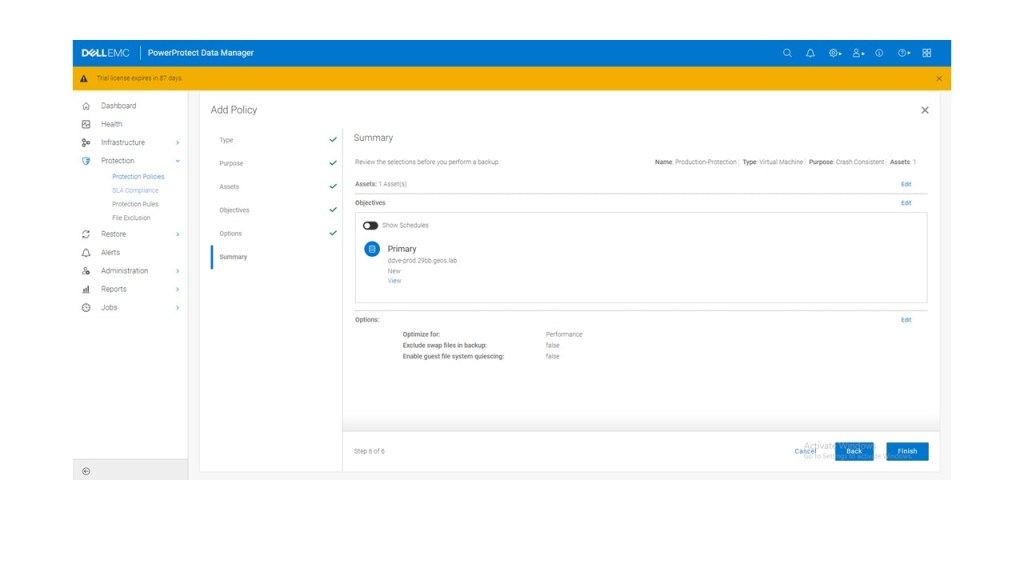
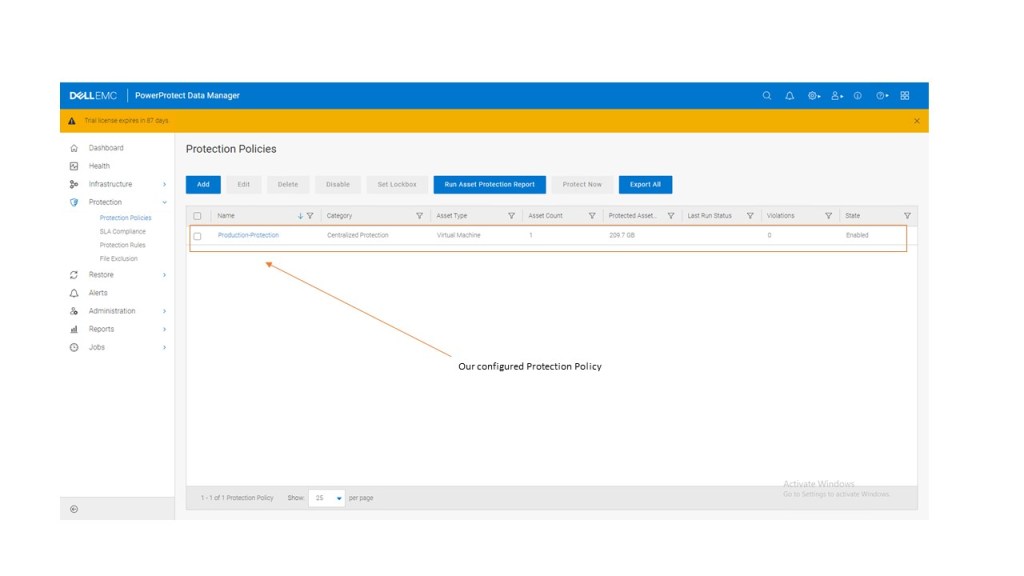
Step 5: Run Protection Policy
We have two options a) direct from the vSphere console and the PPDM plugin or b) manually via the PPDM interface. I’m going to take the latter approach for now. Of course we have scheduled the policy to run everyday at a certain time but in this instance we will initiate the process manually.
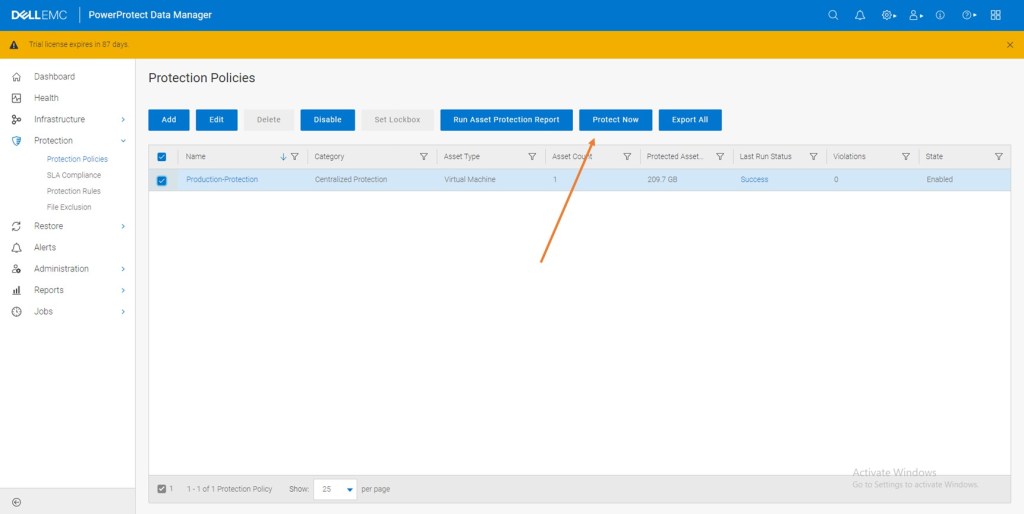
It really couldn’t be more simple. Highlight the Protection Policy and click ‘Protect Now’
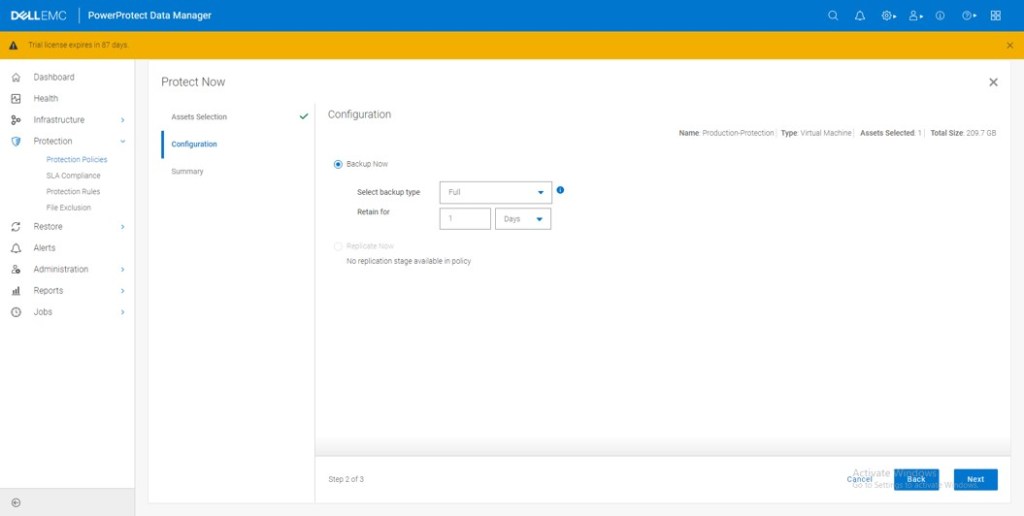
Select ‘All Assets’ – Remember our Policy is only backing up one VM.

In this instance we will select the ‘Full’ Backup. You have an option of a ‘Synthetic backup’ also which backs up the deltas from the original.
Click ‘Protect Now’

The ‘Protection Job’ kicks off, we can monitor its progress in the jobs panel in the GUI.

Once complete we can review in the same window under the successful jobs menu. Note also, not only has our manual job completed successfully, but so have the automated Synthetic Full ‘Policy’ jobs, configured to kickoff each evening at 8pm.

Review
Ultimately the purpose of this exercise was to populate the production side DDVE appliance with data. Once we have data on the production side, we can then set up the MTREE replication into the Cyber Recovery Vault (and automate/control/secure this process via the CR appliance). Logging back into the Data Domain System Manager, we can see the result:
We have Data written Data Domain in the last 24 hours……

Digging a little deeper into the file system itself we can see the activity and the Data Domain compression engine in action. Finally, we see this presented in the MTREE format. This is where we will CREATE the link to the Vault Data Domain Virtual Edition in the next post.


Hopefully, you found this post useful. We are now set to start standing up the CR Vault in the next post. As ever any questions/comments, please reach out directly or leave a comment below and I will respond.
As ever for best practice always refer to Dell official documentation
Cheers
Martin
DISCLAIMER
The views expressed on this site are strictly my own and do not necessarily reflect the opinions or views of Dell Technologies. Please always check official documentation to verify technical information.
#IWORK4DELL


Leave a Reply