

Protecting AWS EKS Container/Kubernetes workloads – Part 1 Introduction
In my last series of posts, we concentrated on setting up the backend AWS infrastructure and deploying PPDM with DDVE, both via the GUI and IAC ( Cloudformation, YAML etc.). So what next? Well we actually want to start protecting some workloads! That’s the whole reason I’m doing the blog.
Being in the cloud, what better workload to get started with than some cloud-native workloads. If like many, you are an AWS consumer, then you will most likely either using the Amazon managed Kubernetes service, Elastic Kubernetes Service (EKS), or will be considering using it in the future. To this end, I’m going to assume nothing and that we are all fresh to the topic, so we will start from the beginning, as if we are setting up a demo POC. You want to use EKS, but you have questions on how you provide a cost effective, efficient availability plan for your modern workloads. Of course that’s where Dell APEX Protection Storage (PPDM and DDVE) on AWS for EKS are a great match.
Standing up our demo AWS EKS Environment
So let’s get straight to it. The rest of this blog will step through the standup of a basic EKS environment. As per normal I have included a video demo of what we will discuss. I am going to use a mix of the command line ( ASW CLI, EKSCTL, KUBCTL) and the GUI. Of course we can execute a single EKSCTL command that will do everything in one go, but it’s nice to understand what we are actually doing under the hood.
Step1: Get your tools and documentation prepared.
I have leveraged the AWS documentation extensively here. It is clear, concise and easy to follow.
https://docs.aws.amazon.com/eks/latest/userguide/getting-started.html
I am using AWS Cloudshell, usually I would use a Bastian host, but Cloudshell takes away much of the pain in ensuring that you have all the necessary tools installed. Find out more here:
https://docs.aws.amazon.com/cloudshell/latest/userguide/welcome.html
We do need one other piece of software that isn’t included in the base Cloudshell setup. That is EKSCTL. Find out more at this link https://eksctl.io/ and installation guidance here https://eksctl.io/installation/. For convenience I have included the code here to deploy this tool on Cloudshell. Note the last line of the code snippet which moves EKSCTL to the local user BIN folder. This will make it persistent across reboot, unless of course you want to re-install every time you launch Cloudshell. I will also post on my Github
# for ARM systems, set ARCH to: `arm64`, `armv6` or `armv7`
ARCH=amd64
PLATFORM=$(uname -s)_$ARCH

curl -sLO "https://github.com/eksctl-io/eksctl/releases/latest/download/eksctl_$PLATFORM.tar.gz"

# (Optional) Verify checksum
curl -sL "https://github.com/eksctl-io/eksctl/releases/latest/download/eksctl_checksums.txt" | grep $PLATFORM | sha256sum --check

tar -xzf eksctl_$PLATFORM.tar.gz -C /tmp && rm eksctl_$PLATFORM.tar.gz

sudo mv /tmp/eksctl /usr/local/bin
Step 2 : Permissions, permissions and more permissions:
As with everything in AWS, you need to be authenticated and authorised to undertake pretty much everything. So if you aren’t the root user, make sure whoever has set you up as an IAM user has granted you enough permissions to undertake the task at hand. You can check your user identity on Cloudshell via the following command:
[cloudshell-user@ip-10-2-2-8 ~]$ aws sts get-caller-identity

Sample Output:

{
    "UserId": "AIDAQX2ZGUZNAOAYK5QBG",
    "Account": "05118XXXXX",
    "Arn": "arn:aws:iam::05118XXXXX:user/martin.hayes2"
}
Step 3: Create a cluster IAM role and attach the required EKS IAM managed policy:
Kubernetes clusters managed by Amazon EKS make calls to other AWS services on your behalf to manage the resources that you use with the service. Permissions, permissions, permissions!
- Create a file named geos-eks-cluster-role-trust-policy.json. I am using Notepad++ to create the file, but you could use any other editor. Add the following JSON code
{
  "Version": "2012-10-17",
  "Statement": [
    {
      "Effect": "Allow",
      "Principal": {
        "Service": "eks.amazonaws.com"
      },
      "Action": "sts:AssumeRole"
    }
  ]
}- Upload the file, using the ‘upload file’ feature in Cloudshell. I have shown this in the video
- Cat to the file to make sure everything is ok
- Create the IAM role using the following configuration. We will call the role Geos-EKSClusterRole ( Copy and Paste into the command line)
aws iam create-role \
  --role-name Geos-EKSClusterRole \
     --assume-role-policy-document file://"geos-eks-cluster-role-trust-policy.json"
- Attach the managed policy to the role, again copy and paste directly into the command line
aws iam attach-role-policy \
  --policy-arn arn:aws:iam::aws:policy/AmazonEKSClusterPolicy \
  --role-name Geos-EKSClusterRole
Step 4: Deploy the EKS Control Plane using the GUI
This really is very straightforward, so just the video for guidance. For simplicity we will use defaults for everything. One thing to note is that it is a requirement to have a least two subnets spread across 2 availability Zones (AZ’s). This is to ensure EKS Kubernetes Control Plane redundancy, in the event you lose an AZ. Go grab Coffee or Tea, and come back in 15-20 minutes
Step 5: Configure kubectl to communicate with the EKS Control Plane
We now need to configure our Cloudshell to allow Kubectl talk to our newly created EKS Control Plane. Items in orange or variables, I have named my cluster geos-ppdm-eks, when i deployed via the GUI, in region eu-west-1
aws eks update-kubeconfig --region eu-west-1 --name geos-ppdm-eks
Step 6: Verify you can reach the Kubernetes EKS Control Plane
Using the kubectl get svc command you should be able to see the kubernetes cluster IP
[cloudshell-user@ip-10-2-2-8 ~]$ kubectl get svc

NAME         TYPE        CLUSTER-IP   EXTERNAL-IP   PORT(S)   AGE
kubernetes   ClusterIP   10.100.0.1   <none>        443/TCP   23m

[cloudshell-user@ip-10-2-2-8 ~]$
Step 7: Create an EC2 Instance IAM role and attach the required EC2 IAM managed policy:
Before we deploy our worker nodes, like we did with the EKS control plane, create an IAM role and attach an AWS managed IAM policy to it, to allow the EC2 instances to execute tasks on behalf of the control plane. the process is exactly the same
- Create a file named geos-node-role-trust-policy.json using your editor of choice. The file should contain the following Json code. Upload to Cloudshell using the upload file feature, as shown in the video. Do a quick CAT to make sure that everything looks as it should.
{
  "Version": "2012-10-17",
  "Statement": [
    {
      "Effect": "Allow",
      "Principal": {
        "Service": "ec2.amazonaws.com"
      },
      "Action": "sts:AssumeRole"
    }
  ]
}
- Create the IAM role, by pasting the following into Cloudshell
aws iam create-role \
  --role-name GeosEKSNodeRole \
  --assume-role-policy-document file://"geos-node-role-trust-policy.json"
- Attach the AWS Managed policies to the newly created role:
aws iam attach-role-policy \
  --policy-arn arn:aws:iam::aws:policy/AmazonEKSWorkerNodePolicy \
  --role-name GeosEKSNodeRole
aws iam attach-role-policy \
  --policy-arn arn:aws:iam::aws:policy/AmazonEC2ContainerRegistryReadOnly \
  --role-name GeosEKSNodeRole
aws iam attach-role-policy \
  --policy-arn arn:aws:iam::aws:policy/AmazonEKS_CNI_Policy \
  --role-name GeosEKSNodeRole
Step 8: Deploy the worker nodes on EC2
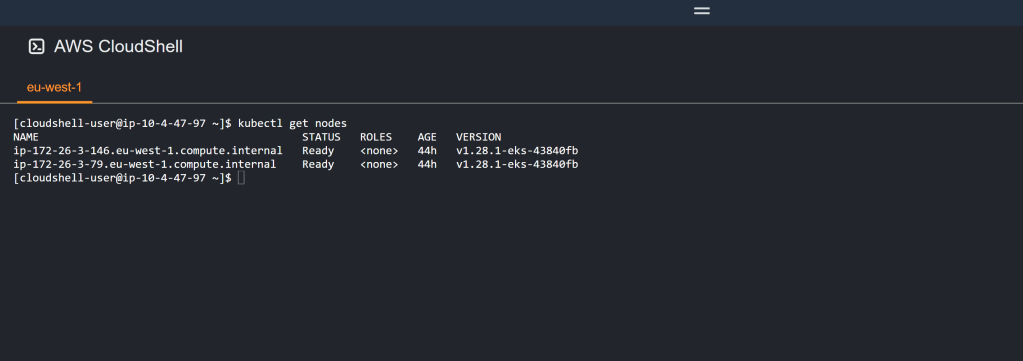
For this part we will again use the GUI. Follow the video demo, and choose the defaults. There are options to scale down the minimum amount of node active at one time and the the size/type of EC2 instance if you so wish. This process will take some time, so more tea/coffee is so required. once done execute the ‘kubectl get nodes’ following command in Cloudshell. If all is well you should see the following and we are in great shape.
Video Demo:
As mentioned rather than overbearing everybody with screenshots, I have run through the above process via video, using the same variables etc. So everything hopefully should be in context.
Coming Next:
Up next we will enable our cluster to work properly with Dell APEX PPDM. This involves installing som snapshotter updates and persistent container storage for AWS EBS storage. Stay tuned!
DISCLAIMER
The views expressed on this site are strictly my own and do not necessarily reflect the opinions or views of Dell Technologies. Please always check official documentation to verify technical information.
#IWORK4DELL
