
Just before the New Year, PowerProtect DDVE on AWS 7.13 dropped. With it came official documented support for AWS S3 Intelligent Tiering. Indeed manual or direct tiering is supported also using S3 Lifecycle Management, but Intelligent Tiering is recommended as it, well just works, and with no nasty retrieval costs associated with it.
Here is the link to where it is documented in the release notes: ( Note you will need a logon)
Dell PowerProtect DDVE on Amazon Web Services 7.13 Installation and Administration Guide
Here is the relevant paragraph, scroll down to page 12:

So what does this mean?
Well, in short we save on backup costs from DDVE to S3. So now you get all the goodness of the native Dell deduplication features of DDOS and DDVE, coupled with all the cost saving optimisations of S3, that have been introduced by Amazon over the last couple of years:
For a small monthly object monitoring and automation charge, S3 will monitor access patterns and automatically move our backup objects to lower cost access tiers, with no retrieval performance or cost penalties. Bottom line, a no-brainer.
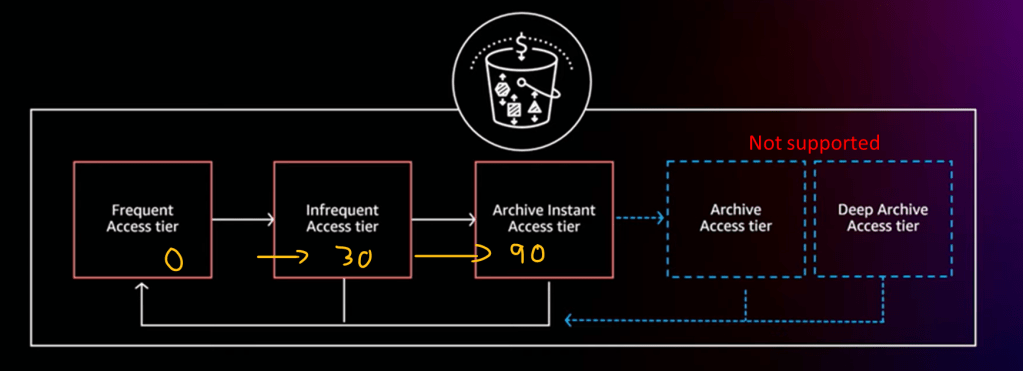
S3 automatically stores objects in three access tiers:
- Tier 1: Frequent Access Tier
- Tier 2: Infrequent Access Tier – (After 30 days of no access, 40% lower cost Tier)
- Tier 3: Archive Instant Access Tier – (After 90 days of no access, 68% lower cost tier)
There are another 2 tiers (Archive Access Tier & Deep Archive Access Tier), that are positioned for data that does not require instant retrieval. These are currently untested/unsupported so please don’t use given the unpredictable times etc. You need to explicitly turn this feature on/opt-in in any regard, so no fear of misconfiguration.
Configuration, This is really straightforward.
Usually I would do an accompanying video demo, but this is relatively short and easy, so screenshots for now. Next month when we pass the 30 days, I will follow up with a video blog overviewing the re-hydration of our backup from the infrequent access tier.
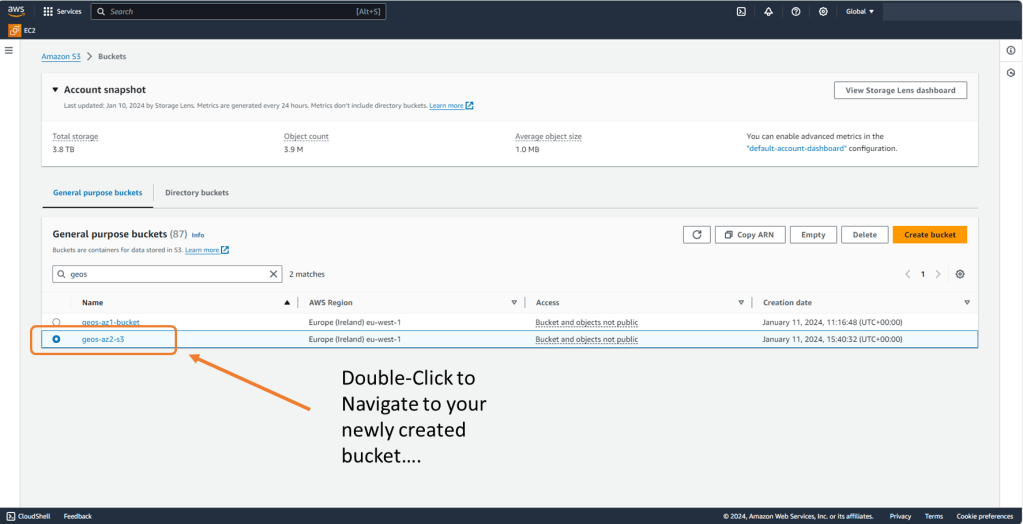
1. Create your bucket as normal
This is very straightforward, just make sure your bucket name is unique, usually unless I had some specific requirement I would accept all the defaults.


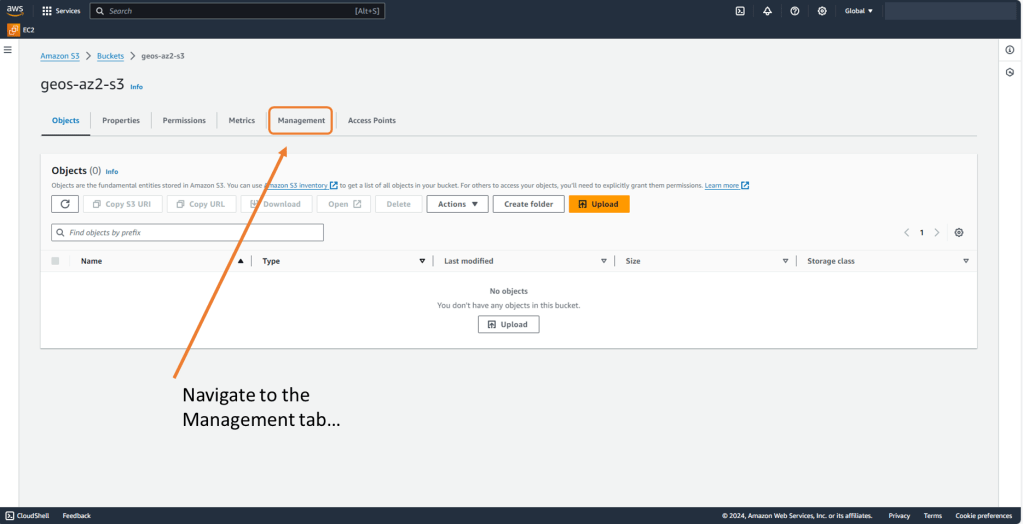
2. Create Lifecycle Policy for the new bucket
A Lifecycle Policy is used to apply the transition to Intelligent Tiering. DDVE requires that Standard Class S3 is used by DDVE. The lifecycle policy allows us to deploy with a Standard Class and transition over time to another S3 storage class, either by user policy (manual) or by intelligent tiering (automated).

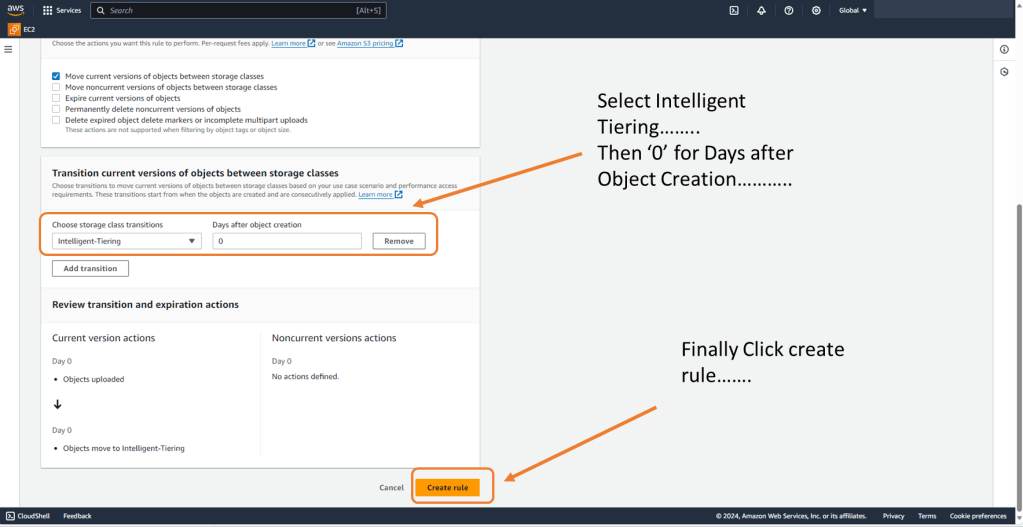
3. Configure Lifecycle rule
So as mentioned, DDVE will expect to see an S3 bucket configured with a Standard class. We adhere to this requirement but we set the lifecycle rule to transition everything to Intelligent Tiering, zero days after object creation. DDVE writes to a standard class as expected, but S3 via the lifecycle policy immediately transitions objects to the Intelligent Tiering class, so the clock starts to 30 days immediately.
We can also apply filters to the policy to push only certain objects in the Intelligent Tier and other configure other lifecycle options. For now though we will keep it simple.

Scroll down…. I couldn’t screen shot the full screen!
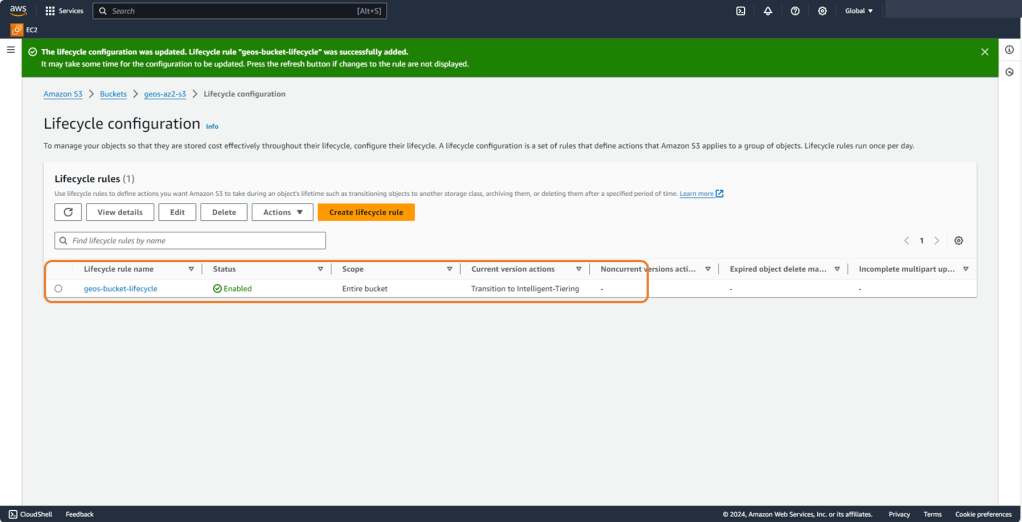
4. Verify your configuration
Lastly have a look at your new lifecycle policy and verify its configuration. Not a whole lot to see or verify as it really is straightforward.
Next Up.
Next month (after 30 days) we will revisit our environment and re-hydrate some EKS kubernetes workload from a PPDM policy. All going well she shouldn’t notice any difference in speed or performance. Overtime we should, if we are careful how we construct our PPDM polices, notice an improvement in our pocket!
DISCLAIMER
The views expressed on this site are strictly my own and do not necessarily reflect the opinions or views of Dell Technologies. Please always check official documentation to verify technical information.
#IWORK4DELL
